Domains
Overview
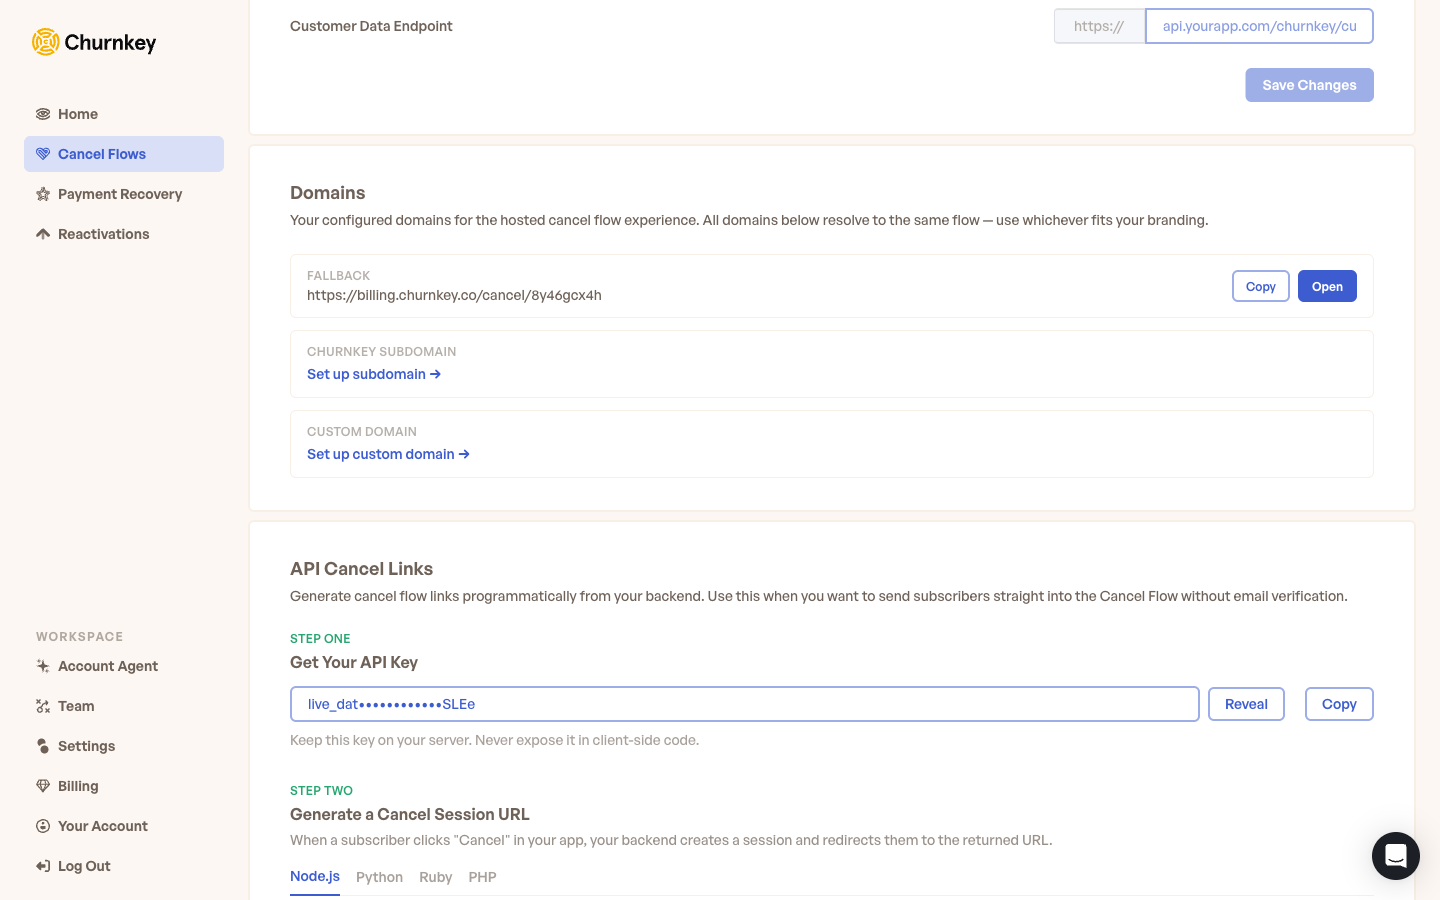
Every merchant gets a working URL the moment Hosted Cancel Flow is enabled — nothing to configure, nothing to deploy. From there, you can optionally upgrade to a branded Churnkey subdomain or a fully custom domain so the address bar your customers see feels like part of your own product.
Three options exist, and they all run the same cancel experience. The only thing that changes is what your customer sees in the address bar and how much setup is involved.
Option 1: Fallback URL (default, no setup)
The fallback URL is the address Churnkey assigns to your account automatically. It works the moment you enable Hosted Cancel Flow and requires zero configuration.
Your fallback URL looks like this:
https://billing.churnkey.co/cancel/<your-app-id>
This is the right starting point for getting up and running quickly, for internal tools, or for any team that does not need the cancel page to live on a branded address. Your customers will see billing.churnkey.co in their browser when they reach the page.
If you stop here — without configuring a subdomain or custom domain — every Cancel Link your backend mints will use this same fallback address, in the form https://billing.churnkey.co/cancel/cl_abc123.... If you later upgrade to a branded domain and verify it, new links automatically start using it without any code changes on your side. See How Churnkey picks the domain for a generated link below for the full priority order.
Option 2: Churnkey Subdomain
A Churnkey subdomain replaces billing.churnkey.co with a name of your choice on the churnkey.co parent domain. The URL pattern looks like this:
https://<your-subdomain>.churnkey.co/cancel
For example, acme.churnkey.co/cancel is more recognizable to an Acme customer than the generic fallback. You pick the subdomain from the dashboard under Cancel Flow → Hosted → Domains, and as long as the name is available, you can use it immediately.
This option is the sweet spot for merchants who want a more branded address without touching their DNS records. Churnkey handles the certificate and the routing — there is nothing to set up on your end beyond choosing the name.
Option 3: Custom Domain
A custom domain points a subdomain you own — such as cancel.yourbrand.com — at Churnkey, so the address bar shows your own domain throughout the cancel experience. This is the most polished option and the right choice for any team that wants the entire flow to feel native to their brand.
Setup takes five steps:
- Pick the subdomain you want to use. Anything works as long as it is a subdomain you control —
cancel.yourbrand.com,account.yourbrand.com,manage.yourbrand.com, and so on. - Add an A record in your DNS provider pointing to the IP address Churnkey shows you in the dashboard.
- Wait for DNS propagation. This usually completes in a few minutes, but it can take up to 24 hours depending on your provider and the existing time-to-live on your records.
- Click Verify in the dashboard. Once your DNS resolves, hitting Verify tells Churnkey to provision the TLS certificate and start routing your domain. Until you click Verify, Churnkey treats the domain as not yet ready and continues using your fallback (or subdomain) URL for any new links.
- You're live. Churnkey handles the certificate from here — there is nothing to upload or renew on your side.
Use a subdomain, not your apex (root) domain. Pointing yourbrand.com directly at Churnkey would route every visitor to your homepage through the hosted cancel page. Always pick a dedicated subdomain like cancel.yourbrand.com.
How Churnkey picks the domain for a generated link
When you mint a Cancel Link through the API — or when Churnkey generates any other link to your hosted cancel page — the link is built using the highest-priority domain you have configured and verified. The order is:
- Custom domain (configured and verified through the dashboard) — for example
https://cancel.yourbrand.com/cancel/cl_... - Churnkey subdomain (if configured) — for example
https://acme.churnkey.co/cancel/cl_... - Fallback URL (always available) —
https://billing.churnkey.co/cancel/cl_...
In other words, the most branded option you have set up and verified wins. Once your custom domain shows the Verified state in the dashboard, every new link Churnkey generates automatically starts using it — there is nothing to change in your backend code, no new environment variable to roll out. Older links minted before the upgrade keep working at their original address until they expire or are consumed.
Because the priority order is automatic, the practical advice is simple: enable the most branded option you can, and Churnkey takes care of the rest. Customers see your domain in the address bar whether they arrive via a self-serve URL or a Cancel Link.
Comparison
| Option | Address bar shows | Setup | Certificate |
|---|---|---|---|
| Fallback | billing.churnkey.co | None | Managed by Churnkey |
| Churnkey subdomain | you.churnkey.co | Pick a name in the dashboard | Managed by Churnkey |
| Custom domain | cancel.yourbrand.com | Add A record in your DNS | Managed by Churnkey |
Troubleshooting
Custom domain not loading after A record setup. Allow up to 24 hours for DNS propagation before assuming something is wrong. Use a tool like dig or nslookup from the command line to verify the A record is resolving to the IP address Churnkey provided. If it resolves correctly but the page still fails to load, make sure you've clicked Verify in the dashboard — DNS resolving is necessary but not sufficient on its own. Also double-check that you pointed a subdomain (not the apex domain) and that no existing record on that subdomain is conflicting.
Mixed-content warnings in the browser. The hosted cancel page only operates over HTTPS. If your own site is served over plain HTTP, customers will see browser warnings when they navigate back from the cancel flow. Always serve your application over HTTPS to keep the entire customer journey secure.